Today I’m going to show you how to make a simple checkerboard and set of checkers with a little wood and paint.

You will need:
- One 12″ x 12″ piece of wood or plywood
- A 12″ section of dowel, 1-1/8″ or 1-1/4″ in diameter
- Access to a power saw of some kind
- Four colors of paint: black, red, ivory, and a fourth color of your choice
- A paintbrush
- Sandpaper
- About 9 feet of 1-1/2″ wide painters tape
- A razor blade or X-Acto knife
*****
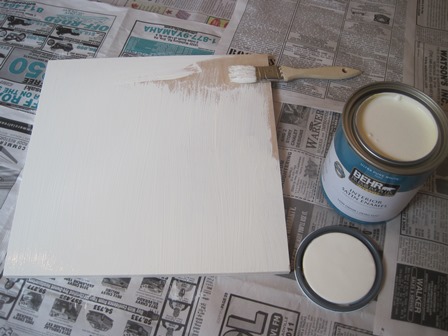
1. Start with your 12×12 board. Give it a solid coat of ivory all over the top.

2. While that’s drying, start on the checkers. Paint half of your dowel red and half of it black. Let dry.
3. Using a power saw, slice the dowel into circles, about 3 pieces to an inch. (My husband did this part, so I won’t deceive you. But I’ll do your math for you to make it easy: You’ll need 12 red and 12 black checkers, which requires about 4 inches of red dowel and 4 inches of black.)
24 checkers x 18 boys = a lot of checkers

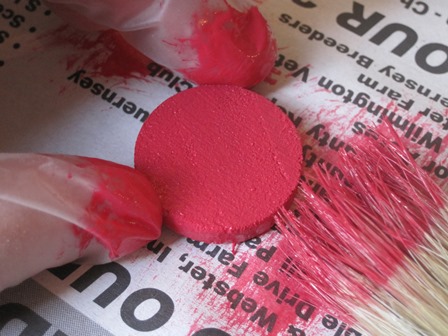
4. The power saw may leave shredded edges…

…so sand them gently with sandpaper. They do not need to be perfect; you just don’t want rough edges catching the fingers of small players.

5. Paint the checkers, 12 red and 12 black, allowing one side to dry before flipping over to paint the other. (Latex gloves are a lifesaver at this point. We also provided homemade smocks for the boys, using kitchen trash bags modified with a few quick cuts–here’s how.)

6. Now, back to the checkerboard! Find and mark the center of your board. Working out from the center, place 8 strips of tape entirely across the board, each one precisely against the next.

(You may note the edge of ivory left exposed on either side. We planned a 12″ board to perfectly fit eight squares, each 1-1/2″ wide. Then we found out that all painters tape has recently switched to the metric system and comes 1.44″ wide instead. We decided not to sweat it, and ignored the extra edge.)
7. Use an X-Acto knife and a ruler to cut a straight line across the center of your board, perpendicular to the lines of tape and cutting through them. You may cut just slightly into the wood; it will not matter. Then move your ruler over the same width as the tape and cut again across the board, parallel to the first cut. You are cutting your strips of tape into squares of tape. (If you have a ruler or makeshift ruler that’s 1-1/2″ wide–or 1.44″ wide, to be exact–this step is very simple. A strip of cardboard will suffice.) Continue this process, working out from the center on each side, until your board has eight squares by eight squares.

8. Peel up alternating squares of tape to expose the ivory surface. Press the remaining squares firmly into place.

9. Choose yourself a nice color of paint. (One of my favorite crafting supplies is a paint sample like those shown here–the perfect size for a small project, and only $3 at Home Depot.)

10. Paint all exposed ivory on the checkerboard with the color of your choice. Let dry.

11. Peel up the remaining squares of tape…

… arrange your checkers… and start playing!

Here’s Ryan’s class, scowling against the bright sun but triumphant nonetheless:

*****
Special thanks…
- To GomiStyle, for a tutorial on the tape squares trick,
- And to Ryan, who did the grunt work.
Wow, impressive! I am always amazed at your creativity. You also do well explaining how to make something.
I’m really enjoying your tutorials and other posts! Keep up the good work! 😉
To see big people helping little people makes me feel good about a Christian upbringing.
I did this but I have a trick or tip call it for getting your paint lines razor sharp where you have some bleed over. if youre using latex, acrylic or any water soluble paint. pick up a bottle of Pledge floor polish. sometimes there will be an atom logo saying “with future” but packaging changes all the time. if you paint the edges of the tape squares on the board it will seal the seams so they are liquid (paint) proof but yet not so sticky that it will stop you from lifting the squares later. this is a trick we used for plastic model building to get sharp lines for camouflage or separation paint schemes. I noticed that you had some bleed over in your picks and thought id share this tip with you. thanks for the step by step it was great and I used game pieces on the circles to make a chess set
Thank you for this tip! I didn’t know how to avoid that bleed. Great method and idea.